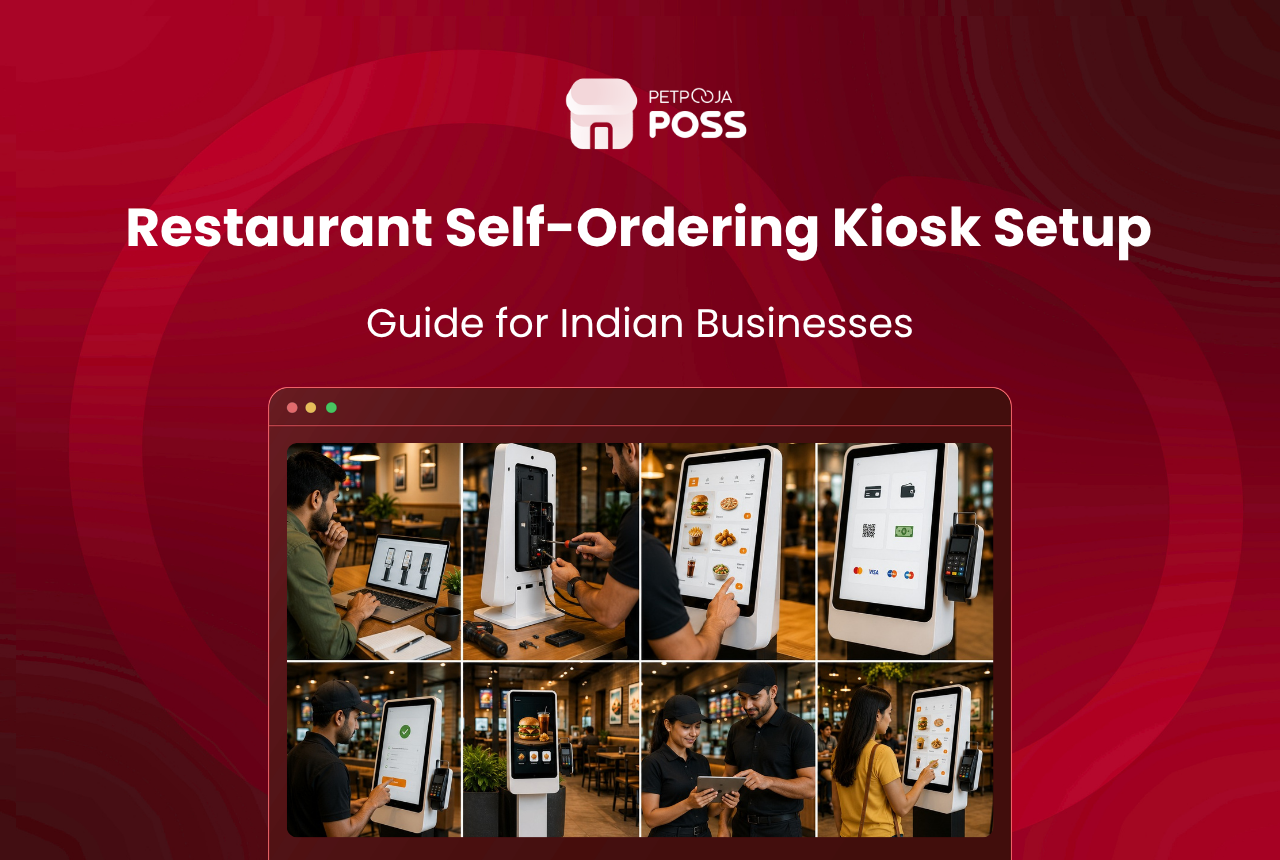
Six steps, roughly a week of work, and no IT team required. You pick hardware that fits your outlet layout, pair it with your existing POS over Wi-Fi, upload menu photos, switch on UPI payments, assign staff roles around the kiosk, and do a round of test orders before letting real customers touch the screen. Most QSR owners we work with at Petpooja finish the whole thing between a Monday and the following weekend.
Key Takeaways
- Wall-mount kiosks suit narrow QSR layouts; floor-mount kiosks work better in lobbies and food courts
- The kiosk pulls menu data, pricing, and stock status from your POS; no duplicate data entry
- UPI QR is the default payment method for Indian customers; card and pay-at-counter are secondary
- Assign a floor helper near the kiosk for the first 2-3 weeks; do not remove your billing counter on day one
- Run at least 10 test orders covering edge cases (customisations, payment timeouts, cart changes) before going live
Below is each step with the details that actually matter during installation.
Pick Your Hardware Based on Where the Queue Forms
Wall-mount or floor-mount. That is the first fork in the road, and the answer depends on your entrance, not your budget.
Wall-mount units (22-inch or 27-inch screen) bolt flat against a solid wall. They eat zero floor space. A shawarma counter tucked into a narrow lane in Aundh, Pune, or a sandwich shop squeezed between two stores in Vastrapur, Ahmedabad, cannot afford a freestanding unit blocking the only walkway. The screen sits at eye level, the thermal printer sticks out from the bottom, and the entire thing takes up less wall real estate than a fire extinguisher.
Floor-mount units (27-inch or 32-inch) stand on a steel cabinet weighted at the base. These belong in lobbies, wide entrances, food court stalls. A 32-inch screen parked near the door of a biryani QSR in Madhapur, Hyderabad doubles as both an ordering station and a lit-up menu that pulls walk-ins off the street.
| Feature | Wall-Mount | Floor-Mount |
|---|---|---|
| Screen size | 22″ or 27″ | 27″ or 32″ |
| Best for | Narrow entrances, small QSRs | Lobbies, food courts, wide entrances |
| Space needed | Wall surface only | ~2 sq ft floor area |
| Visibility from distance | Low | High (acts as menu display too) |
| Built-in printer | Yes | Yes |
| Wi-Fi + Bluetooth | Yes | Yes |
Both types ship with Wi-Fi, Bluetooth, and a built-in thermal receipt printer. Indian manufacturers like Addsoft (ISO-certified, 20+ years in retail hardware) and global brands like Posbank (present in 80+ countries, per their company profile) produce them locally. Onsite warranty and spare parts are available without waiting for an overseas shipment.
Before you order, check the mounting surface. For example, we have seen installations stall because the wall turned out to be a glass partition that could not hold the weight. Floor-mount units need a level surface and a power socket within 2 metres. Get your electrician involved before the kiosk arrives, not after.
Pair It with Your POS (This Takes 20 Minutes, Not 2 Days)
Most owners brace for a complicated integration. The reality is anticlimactic.
A kiosk that works with your restaurant POS connects over Wi-Fi to the same backend. Power the kiosk on, enter the pairing credentials, and it pulls your live menu, current prices, GST configuration, and item availability in one go. No spreadsheet uploads. No manual entry of 47 menu items one by one.
For a single-outlet QSR, pairing wraps up in 15-20 minutes. Chains with outlets across Surat, Rajkot, and Vadodara pair each kiosk to its local POS instance from the central dashboard. A price change pushed from head office shows up on every kiosk in every city within minutes.
Four things to verify right after pairing:
- The kiosk menu matches the counter POS item-for-item
- Prices and GST breakup are identical
- Items you marked “out of stock” on the POS do not appear on the kiosk
- A test order placed on the kiosk shows up on the kitchen display (KOT) next to counter orders
A self-ordering kiosk pairs with an existing restaurant POS over Wi-Fi in 15-20 minutes for a single outlet. It pulls the live menu, pricing, GST configuration, and item availability from the POS backend without manual data entry or spreadsheet uploads.
If any of these fail, the pairing credentials are usually wrong or the kiosk is pointed at a different outlet’s POS instance. Takes five minutes to fix.
Menu Configuration Is Where You Spend the Real Time
The POS and the kiosk share the same data. But a cashier can say “the combo comes with fries and a drink.” A screen cannot talk. It has to show. This step is about making the menu work visually on a touchscreen, and it takes longer than the hardware install.
Three things eat the most hours here.
Photos. Every menu item needs one. Not a stock image pulled off the internet, but a shot of the actual dish as your kitchen serves it. The FSSAI food safety regulations do not mandate menu photos, but customers eating with their eyes first is not a regulation issue, it is a revenue one. Customers ordering on a kiosk rely entirely on what the photo looks like. A missing image for your best-selling chicken biryani means fewer taps on that item. For example, one QSR owner in Kothrud, Pune told us his loaded fries climbed from the 8th most-ordered item to the 2nd within a week of replacing the placeholder with a real photo.
Categories. Five to seven groups, named the way customers think. “Burgers,” “Sides,” “Drinks,” “Desserts” works. “Section A,” “Section B,” “Veg Main Course” does not. Every extra category adds one more tap between the customer and the checkout screen.
Upsell prompts. This is the part most owners rush through and then wonder why their kiosk ticket sizes are not climbing. A digital menu on a kiosk can flash a cheese dip suggestion with every burger, a cold drink with every combo, a dessert at checkout. These prompts run on autopilot once configured and are the primary reason kiosk cheques come in 15-35% higher than counter cheques.
Payments: UPI First, Everything Else Second
Indian QSR customers do not pay the way American or European customers do. Your payment setup needs to reflect that.
UPI QR comes first. After the customer confirms their order, the kiosk generates a dynamic QR code. They scan it with Google Pay, PhonePay, Paytm, whatever UPI app they use. Payment confirms in seconds, and the order fires to the kitchen. For anyone under 35 standing in a QSR queue, scanning a QR is reflex at this point, per NPCI transaction data.
UPI QR is the default kiosk payment method in Indian QSRs, reflecting the country’s 16.6 billion monthly UPI transactions as of March 2026 per NPCI data. Card and pay-at-counter options serve as secondary methods for customers who have not adopted digital payments.
Card tap (debit and credit) stays enabled as a backup. Some office-lunch regulars still prefer it.
Then there is the “pay at counter” toggle, and you should not disable it during the first month. The customer places the order on the kiosk screen, gets a token, walks to a small counter, and pays cash. Some older regulars will insist on this. Removing the option too early generates complaints you do not need during the settling-in period.
Staff Roles Around the Kiosk (The Step Everyone Skips)
Nobody reads the manual for a TV remote either, but a TV does not take food orders during your busiest hour. Skipping the staff briefing before go-live creates a messy first Saturday.
Three assignments need to happen before the kiosk goes live.
Floor helper stands near the kiosk during peak hours for the first 2-3 weeks. This person is usually a cashier pulled off the counter. Their job: walk hesitant first-timers through the flow, answer “where do I pay?” questions, handle the rare screen freeze by restarting the unit. After the third week, most regulars are self-sufficient and the helper shifts to a roaming role.
Order handoff person watches the kitchen display, calls out token numbers, and matches bags to receipts. With a kiosk feeding orders directly to the kitchen, the pace picks up. If your handoff person is slow, orders pile up at the collection point and customers start asking “where is token 47?” while token 52 is already being packed.
Counter backup. One billing counter stays active for at least a month. Large group orders, elderly regulars, someone whose phone died mid-UPI scan. These cases are few, but they are real, and forcing everyone onto the kiosk from day one creates friction.
Add kiosk-specific tasks to your restaurant opening/closing checklist: screen wipe-down at open, printer paper check, payment terminal status, end-of-day kiosk sales reconciliation with the POS report.
Test the Full Flow Before a Single Customer Touches the Screen
Your first real customer should not be your beta tester. Run at least 10 complete test orders during off-hours with staff playing customers.
Cover these scenarios deliberately:
- Add 12 items, remove 6, proceed to checkout. Does the cart update correctly?
- Switch from “Dine In” to “Takeaway” mid-order. Does the token reflect the change?
- Let the UPI payment screen time out. Does the kiosk reset gracefully or freeze?
- Place a customised order (no onion, extra cheese). Does the KOT print the modifiers?
- Unplug the Wi-Fi router mid-order. Does the kiosk store the order offline and sync later?
That last test matters more than the others. Any kiosk worth buying supports offline mode, but not every vendor includes it by default. If the kiosk crashes when Wi-Fi drops during a monsoon-week power cycle at your Tier 2 outlet, you will discover it at the worst possible moment. Better to find it at 4 pm on a Tuesday with zero customers watching.
Conclusion
Setting up a self-ordering kiosk in an Indian QSR is a week-long project, not a month-long one. Hardware depends on your floor layout. POS pairing takes under an hour. Menu photos and upsell prompts deserve the most attention because they directly drive what customers order. Payments default to UPI. Staff need new roles, not pink slips. Test before going live.
Start with Petpooja POSS to see how the kiosk plugs into your existing restaurant setup.
Frequently Asked Questions
5-7 days for most single-outlet QSRs. Day one covers the physical install: mounting, wiring, printer setup. POS pairing wraps up in under an hour on day two. The rest of the week goes into menu photos, category restructuring, and staff briefing.
No. It runs on the same Wi-Fi as your POS. Make sure the router handles the extra device. If broadband in your area is unreliable, keep a 4G dongle plugged into the router as failover.
Restart the kiosk. The in-progress order resets, and the floor helper walks the customer through a fresh one. Freezes on commercial-grade hardware from Addsoft or Posbank are rare, maybe once in a few hundred orders. Keeping one counter active during the first month covers this without drama.
No. Kiosks are for walk-in customers only, dine-in and takeaway. Aggregator orders continue flowing through your POS via the existing integration. Both streams land on the same kitchen display.
Check five things: POS compatibility, offline mode, warranty type (onsite beats carry-in), screen brightness (matters if your entrance gets direct sunlight), and local service centre availability. A vendor evaluation template helps you score each option on the same criteria before committing.