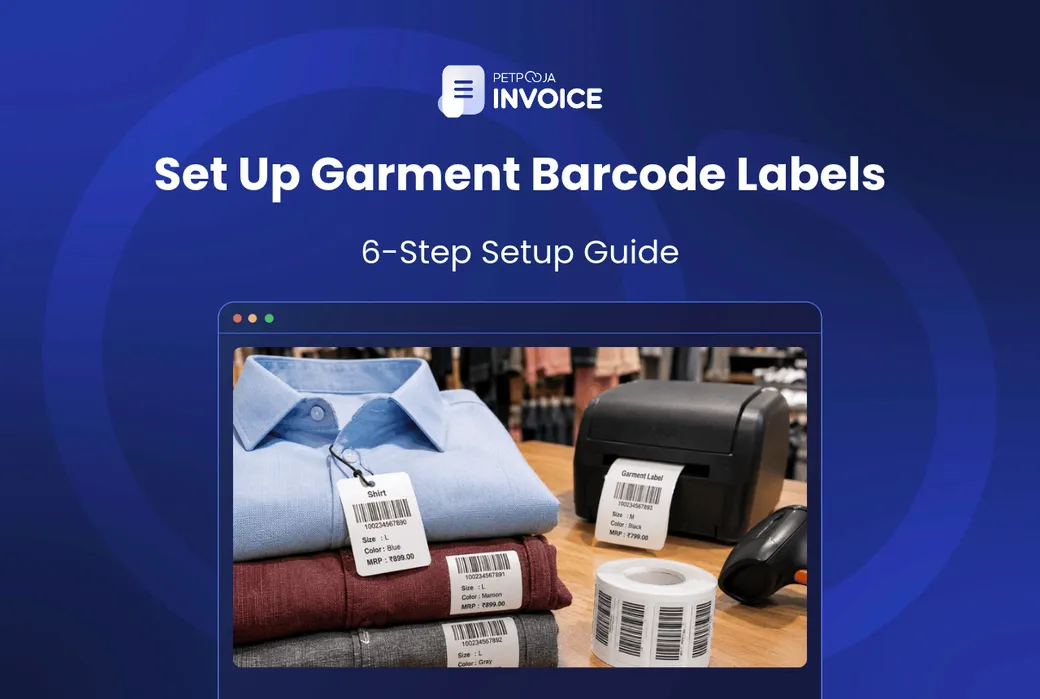



How do you set up garment barcode labels for a retail store? It takes 6 steps. You set up every size and colour as its own item, choose a code system, and pick the tag. Then you decide what the label shows, print it, and scan it at billing.
Two things shape your answer. The first is how many sizes and colours you stock, since each needs its own code. The second is where you sell. A shop that sells only at its own counter can use its own codes. One that supplies large retail chains or sells on online marketplaces usually needs registered barcodes.
It is tempting for Indian retailers and shop owners to start with the tag, but the tag is step 3. The item list behind it decides whether the label is any use.
This post walks through all 6 steps in order. It then shows what one scan does to your stock and your GST bill, and the mistakes to avoid.
Key Takeaways
- Build the item list first, then pick codes: if sizes and colours share one item, no label can tell them apart.
- In-store codes are free and enough until a chain or marketplace asks for GS1.
- Your tag goes beside the maker’s packed details, never over them.
- Picking an item by name at the counter undoes the label, so scan every piece.
Why Retail Shops Put a Garment Barcode Label on Every Piece
Clothing shops barcode every piece so the bill always carries the exact size and colour that was sold.
A garment barcode label is a tag or sticker that carries a barcode for one exact piece: one design, in one size and one colour. The scanner reads it at the counter, and the billing software finds the item, its price and its stock.
Without a barcode, the cashier types or picks the item by hand. On a busy evening, a blue shirt in medium can easily be billed as a blue shirt in large. The bill still looks right, but your stock is now wrong in two places. It is one of the common inventory mistakes retail stores make.
So the label is not really about printing. It is about making sure every piece on the rail matches one line in your item list.
6 Steps to Garment Barcode Labels for a Retail Store
The 6 steps below take a clothing shop from no labels to scanning every piece at billing. Step 1 builds the item list, and its count tells you how many GS1 codes to buy in step 2, if you choose GS1. Steps 3 to 6 then follow in order.
The 6 steps:
- Set up each size and colour as its own stock-keeping unit (SKU)
- Choose your code system
- Choose the tag or sticker, its size and material
- Decide what goes on the label
- Print the labels
- Attach the labels and scan them at billing
1. Set Up Each Size and Colour as Its Own SKU
Your first job is the item list. An SKU is one exact item you track in stock. In a clothing shop, every size and colour of a design is a separate SKU, with its own code and its own label.
Take a menswear store in Sector 17, Chandigarh, with one shirt design in 3 colours and 4 sizes (an example). That is 3 x 4 = 12 SKUs, not one. If you set it up as one item called “Shirt”, the scan cannot tell a blue medium from a blue large.
A code that a person can read helps your staff too. Here is one simple pattern:
| Part of the SKU Code | Example | What It Tells Your Staff |
|---|---|---|
| Product type | SH | Shirt |
| Design number | 0412 | The design or style |
| Colour | BLU | Blue |
| Size | M | Medium |
So the full code is SH-0412-BLU-M. Set up all 12 items in your billing software before you print a single label. Our gated barcode and SKU setup guide has a fuller format for naming and numbering.
Some items have no size. A saree showroom in Kanchipuram might use design and colour only (an example). The rule stays the same: if a customer can choose between two pieces, each one gets its own SKU.
2. Choose Your Code System: In-Store Codes or GS1
With the item list ready, choose between codes you make yourself and registered GS1 barcodes. In-store codes work inside your own shop, while GS1 barcodes work anywhere in the supply chain.
In-store codes are numbers or letters you assign in your billing software. You pay nothing to register them. They suit a shop that buys loose stock from a wholesale market, like Surat’s Ring Road textile markets, and sells only from its own shop.
One format that suits these codes is Code 128, set out in the international standard ISO/IEC 15417. Code 128 can carry letters, numbers and symbols such as hyphens, so a code like SH-0412-BLU-M fits.
GS1 barcodes are registered numbers that are unique worldwide. GS1 India says it is the only authorised seller of barcodes starting with 890 in India. It warns that anyone else selling such codes has no legal authority.
The GS1 barcode on retail products is usually EAN-13 (European Article Number). A GS1 India guide says it has 13 digits and is commonly found on retail products.
You need GS1 barcodes when your clothes are sold beyond your own shop. GS1 India says businesses that sell through retail chains or online marketplaces must get GS1 barcodes. If you sell your own label of kurtas to a large chain, plan for GS1.
The registration page asks for a PAN, a request letter, bank proof, proof of your business type and turnover proof. A new company does not need the turnover proof.
Fees depend on your turnover, the number of barcodes and the years you choose. The number of barcodes cannot be changed later, so use the SKU count from step 1. The Chandigarh store’s 12 SKUs need 12 codes.
3. Choose the Tag or Sticker, Its Size and Material
Choose the label by how the garment is sold. Pieces on a rail or shelf usually take a hang tag, and pieces in a pack take a sticker. A hang tag, or swing tag, is a card fixed with a plastic pin or string. A sticker goes on a polybag, box or tag.
| Garment in Your Retail Store | Label That Usually Suits It | Why It Fits |
|---|---|---|
| Shirts, kurtas, trousers on a rail | Card hang tag | Room for every field, fixed through a seam or neck label |
| Vests, innerwear, socks in polybag packs | Sticker on the pack | Flat surface, and no tag pin through the cloth |
| Sarees and dress material | Sticker on the pack, or a tag pinned to the fold | The fold or pack stays closed on the shelf |
| Premium or often-tried pieces | Polyvinyl chloride (PVC) or polyester tag | Usually holds up better to handling than paper |
The table is a starting point. If a piece is sold both ways, label it the way it sits on your shelf.
Paper tags come in GSM (grams per square metre), and a higher GSM means a thicker card. Sticker rolls come in plain paper, chromo (glossy coated paper), direct thermal paper or polyester. Polyester usually lasts longer when a piece is tried on many times.
Sizes vary, so the table below groups what sellers list for each type.
| Label Type for Garments | Sizes Seen in Listings | Price Listed by Sellers (IndiaMART, 5 November 2026) |
|---|---|---|
| Card or paper barcode hang tag | Custom sizes; the higher price is for 250 GSM card | About ₹1.10 to ₹1.42 a piece |
| Printed paper price tag | 1.5 x 3 inches | About ₹1.50 a piece |
| PVC garment tag | Custom sizes; the higher price is for barcode-printed tags | About ₹0.50 to ₹2 a piece |
| Chromo barcode sticker roll | 50 x 25 mm | About ₹120 to ₹175 a roll |
| Direct thermal sticker roll | 75 x 50 mm | About ₹190 a roll |
| Plain paper sticker roll | 38 x 38 mm | About ₹119 a roll |
These prices were listed by sellers on IndiaMART at the time of writing. Listings change, so check the current price with the seller before you buy.
The roll prices above come from the barcode labels listings and the tag prices from the garment tags listings. Most roll listings do not say how many labels a roll holds, so ask before you compare.
Pick the size that fits your fields, which step 4 sets out. A 50 x 25 mm sticker is tight for all six fields. A hang tag has room for all of them, so shops often use one.
4. Decide What Goes on the Garment Barcode Label
Your own garment barcode label should carry six fields: item name, size, colour, maximum retail price (MRP), the barcode and the SKU code. The MRP is the highest price the piece can be sold for.
Cotton Shirt Size: M Colour: Blue MRP ₹1,299 incl. of all taxes SH-0412-BLU-M Item name Size Colour MRP Barcode SKU code A shop’s own hang tag with its six fields. The cream fill is the card tag. The shirt, price and code are an example.The barcode holds only the SKU code. The price lives in your billing software, and the tag shows it in plain text.
If the garment comes pre-packed. A shirt or vest packed at the factory already carries the maker’s details under the Legal Metrology Packaged Commodities Rules, 2011. These include:
- The maker’s or packer’s name and address
- The MRP, inclusive of all taxes
- The month and year of manufacture
- The net quantity, or the number of pieces
Never cover these with your tag. You can always charge less than the MRP. If you add a sticker with a lower MRP, it must not cover the maker’s MRP.
5. Print the Garment Barcode Labels
Printing comes after the items are set up, so each label carries a code your software already knows. Print from the SKU list, not from memory.
You can print in-house or order printed tags from a label printer. In-house printing needs label design software, a barcode printer and the right roll. Direct thermal printing needs no ribbon, but the print can fade over time. Thermal transfer printing uses a ribbon and usually lasts longer on tags.
Three habits keep printing clean:
- Print one test label and scan it at the counter before you print the batch.
- Print the count you received. If 8 white large shirts arrived, print 8 labels, so every piece on the rail has one.
- Keep spare labels with their item, not in a loose pile, so a lost tag can be replaced with the right code.
Stock from a wholesaler often arrives without barcodes. Tag it when you enter the purchase, before the pieces reach the rail.
The count you print should match the goods you entered on arrival. Our stock management template helps you check the two against each other.
6. Attach the Labels and Scan Them at Billing
The last step is where the label starts paying back: fix it to the piece, then scan it into the GST bill. The next section shows what each scan changes on the bill and in your stock.
Fix tags in the same place on every piece, like the neck label of a shirt or the waistband of trousers. A cashier who knows where to look scans faster.
At the counter, the scan does the typing. With Petpooja Invoice, one scan adds the item to the GST bill at its set price and GST rate. Real-time stock tracking updates your count in the same moment.
AI features for retail. Petpooja Invoice also lists AI features built for retail, including Garment AI Try-On for clothing stores and an AI Inventory Agent for stock.
Write your counter routine into a retail billing SOP checklist so every cashier scans the same way.
What One Scan Does to Your Retail Stock and GST Bill
One scan does two jobs at once: it puts the exact piece on the GST bill, and it takes that piece out of stock. Here is how that plays out in the Chandigarh menswear store from step 1.
During the Navratri week in October 2026, the store receives 10 pieces of each of its 12 shirt SKUs (an example). That is 120 shirts, so it prints 120 labels.
A customer buys a blue medium and a white large, each at an MRP of ₹1,299. The cashier scans two tags, and the bill shows two lines with the right size and colour. The bill total is ₹2,598.
Here is the first of those two scans, step by step.
1 Scan the tag SH-0412-BLU-M, blue medium 2 GST bill One line: blue medium shirt, ₹1,299 3 Stock Blue medium: 10 before, 9 after One scan, two jobs, using the menswear store example. White: the scan at the counter. Green: the two records the scan updates, the GST bill and the stock.The second scan does the same for the white large. The table shows both changes to stock.
| What Changes After Two Scans | Before the Sale | After the Sale |
|---|---|---|
| Blue medium (SH-0412-BLU-M) in stock | 10 | 9 |
| White large (SH-0412-WHT-L) in stock | 10 | 9 |
| All shirts of design 0412 in stock | 120 | 118 |
Now picture the same sale typed by hand, with the blue large picked by mistake. The stock list would show 10 blue medium shirts while the rail holds 9. Nobody finds it until the next stock count. Scanning removes that guess from the counter, which is the main point of our manual billing vs POS comparison.
What I could recommend from my end. Before a new design goes on the rail, tag one piece and bill it as a test sale. Then open the stock report.
If that exact size and colour dropped by one, your labels and item list agree. If another item moved, fix the setup before you tag the rest.
Handling Size Exchanges at the Billing Counter
A size exchange is two records, not one. Raise a credit note for the returned piece, then a new bill for the piece the customer takes. Scan both tags, so stock for both sizes stays right.
Say the customer brings back the blue medium and takes a blue large instead (an example). The credit note puts blue medium back from 9 to 10. The new bill takes blue large from 10 to 9.
Exchanges done this way leave nothing for the next stock count to find.
Garment Barcode Label Mistakes Shop Owners Make
Most label problems trace back to the item list or the counter, not the printer. These are the ones to watch for.
- One item for all sizes. The scan works, but the stock report cannot tell you which size sold out.
- Covering the maker’s details. A shop sticker over the printed MRP or address on a pack breaks the rule from step 4.
- Putting the price in the barcode. Keep only the SKU code in the barcode. For an end-of-season sale, change the price in your billing software instead of reprinting barcodes.
- Picking items by name when the scanner is slow. One bill picked by name brings back the errors the label was meant to stop.
- Skipping the count. Labels make counting faster, so count one rack a week with cycle counting rather than closing the shop.
Your stock method matters as much as the label. Our post on inventory control methods helps you pick one that suits a clothing store.
Conclusion
Garment barcode labels for a retail store come down to 6 steps, and the label itself is only the middle of them. The item list comes first, and the scan at the counter is where it pays back.
Start with steps 1 and 2. Set up every size and colour as its own SKU, then choose in-store codes or GS1 barcodes based on where you sell.
For small Indian business owners and shop owners, a label is only as good as what reads it at the counter. With Petpooja Invoice, each scan of a garment barcode label puts the exact size and colour on the GST bill and updates your stock in real time.
Frequently Asked Questions
Can I Use the Barcode Already Printed by the Brand?
Yes, if it is a registered barcode that is unique to that size and colour. Add it to the item in your billing software, and the scan will find it. If a brand uses one code for every size, add your own tag, so you can still track each size.
Do I Need Separate Barcodes for Each Branch?
No. Use the same SKU code for the same piece in every branch. Each branch then keeps its own stock count of that code, and you can compare sales of the same design across shops.
What Should I Do When a Garment Barcode Label Will Not Scan?
Type the exact SKU code printed under the bars, and never pick the item by name. After the sale, reprint the tag. If many tags fail, check that the print is dark and that the bars are not creased by the tag pin.
What are the Four Types of Labels on Clothes?
Most branded garments carry these labels: a brand label, a size label, a care label with washing advice, and a price or barcode tag. Only the price or barcode tag is yours as a shop. The others come from the maker.
When Should a Clothing Shop Start Using Barcodes?
Start before a busy season, not during it. Leave time before festive stock arrives to set up items and tag the pieces. Our clothing retail seasonal planning guide helps you plan that stock.
Thanks. This helps us make the next article better.

Ashwiniba Vaghela is Senior Executive – Content at Petpooja and the editorial reviewer, which means she also helps in reviewing blogs. She writes the explainers and comparisons people read before they know what to search for: what a category actually is, what it costs to keep doing the job by hand, and which differences between two tools matter once you are running a business rather than evaluating one. Much of her work is built on Petpooja's own numbers rather than borrowed industry reports, and with 1,50,000+ businesses, the patterns in that data answer questions no public survey covers. If you are trying to understand something before you commit money to it, Ashwini is writing for you, and if you have read anything else on this blog, she has already checked it.