


 Photo: Dheerajk88, CC BY-SA 4.0, via Wikimedia Commons
These 10 food photography tips for restaurants work with the phone already in your pocket, a window and a quiet stretch before service.
Many menu photos go wrong for simple reasons. The light is yellow, the plate is messy or the dish looks bigger than what arrives at the table.
This guide fixes each of those, one tip at a time. It covers light, angles, plating, delivery app listings and vertical video, then gives you a 90-minute plan to shoot your top 10 sellers.
Key Takeaways
- Start by shooting next to a window with the kitchen lights off.
- Then match the angle to the dish, walk closer and wipe the plate rim.
- Next, pick a contrasting surface and add garnishes last.
- Then shoot the real portion, with one dish per delivery photo.
- And edit lightly, shoot upright and shoot your best sellers in one session.
What Makes a Restaurant Food Photo Sell?
A food photo sells when it looks appetising, shows exactly what the diner will get and still reads clearly as a small thumbnail.
Check every photo against these three tests:
- Appetising: the food looks fresh, warm and full of texture.
- Accurate: the portion, plate and garnish match what you serve.
- Readable when small: the dish is still clear at the size of a thumbnail on a phone.
On a delivery app or a social feed, your dish often shows up as a small square on a phone screen. If a diner cannot tell what it is at that size, the photo has not done its job.
Why Does Food Photography Matter for Restaurants?
Food photography matters because a diner ordering from a screen cannot smell or taste the dish, so the photo has to do that work. One good shoot then serves your delivery listings, social media, printed menu and menu boards.
10 Food Photography Tips for Restaurants, Shot on a Phone
These 10 food photography tips for restaurants need a phone, a window, a few things from the kitchen and the dishes you already serve.
1. Shoot by a Window With the Kitchen Lights Off
Daylight from a window is the best free light you have, so set up your table next to one and switch off the lights overhead.
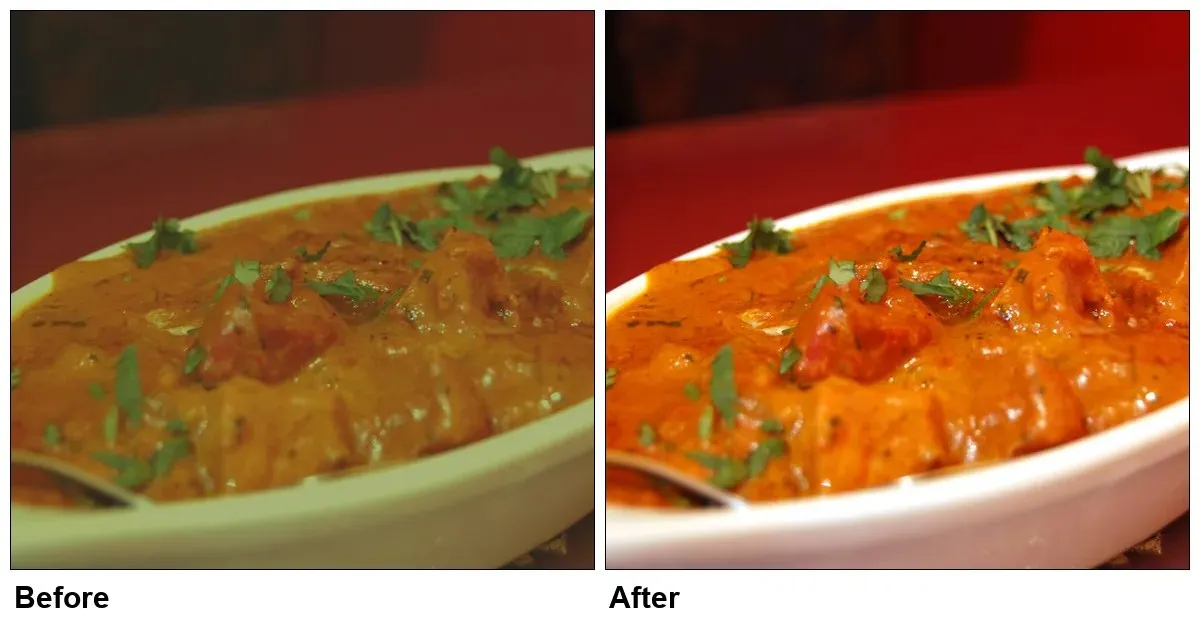 Photo: stu_spivack, CC BY-SA 2.0, via Wikimedia Commons; the before version edited by Petpooja, shared under CC BY-SA 2.0
Tube lights and warm bulbs in a kitchen give food a yellow or green cast. Mixing them with daylight makes it worse, because each part of the plate picks up a different colour.
Place the dish close to the window, with the light coming from the side or slightly behind it. Side light shows texture, like the layers in a paratha or the grains in a biryani.
If one side of the dish looks too dark, hold a sheet of white card on that side to bounce light back onto it.
Soften Harsh Sun With Butter Paper
Direct sun makes hard shadows and bright white spots on gravies, so soften it before you shoot.
Tape a sheet of butter paper or a thin white cloth over the window. It spreads the light, so the shadows turn soft and the shine on the curry calms down.
If the sun moves onto your table during the shoot, shift the table a little away from the window.
When you are ready to build a proper setup, our guide to food photography equipment lists the kit worth buying.
2. Match the Camera Angle to the Dish
Every dish has one angle that shows off its best feature, so choose the angle by the shape of the food.
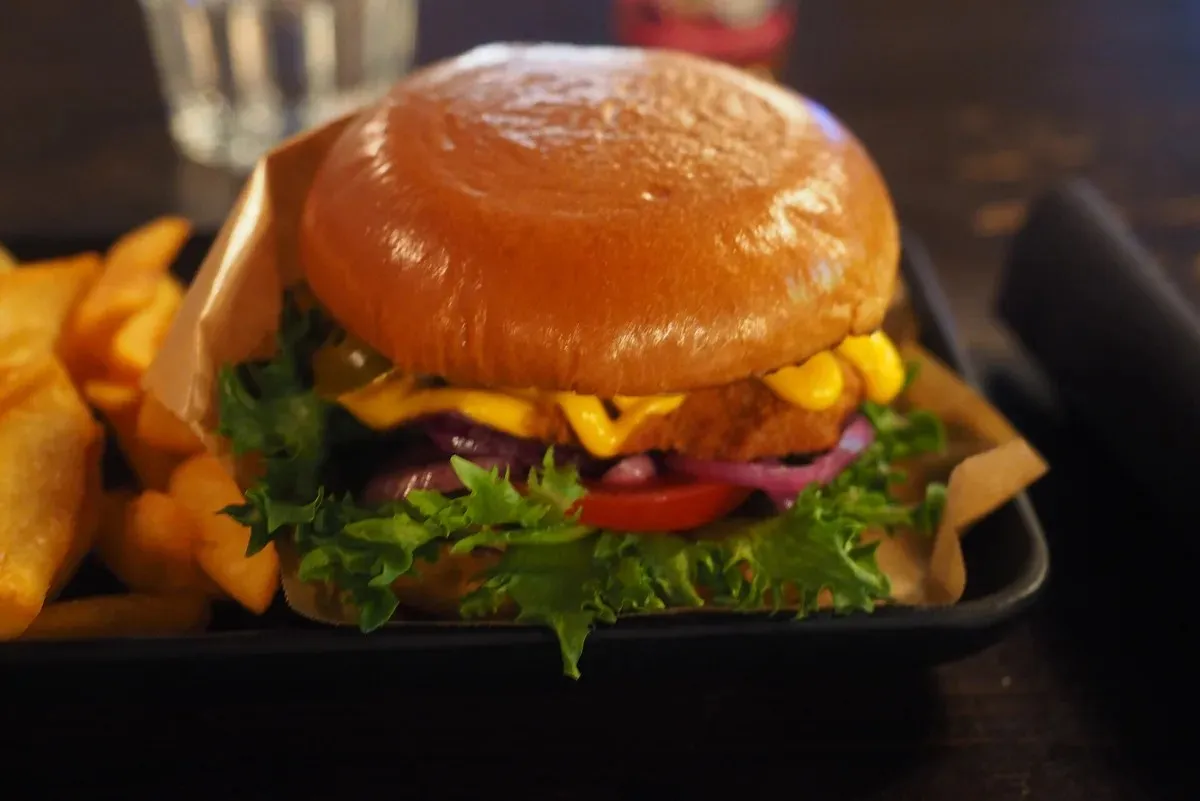 Photo: JIP, CC BY-SA 4.0, via Wikimedia Commons
A flat dish shows its best side from the top. A tall dish needs a side view, and most bowls look best from where a diner sits.
Shoot Thalis and Pizzas From Above
Hold the phone straight over the dish for anything flat, where the layout is the selling point.
Thalis, pizzas, dosas and spreads of several dishes all work well from above. Keep the phone level, so a round plate does not look oval, and turn on your camera’s grid lines to help.
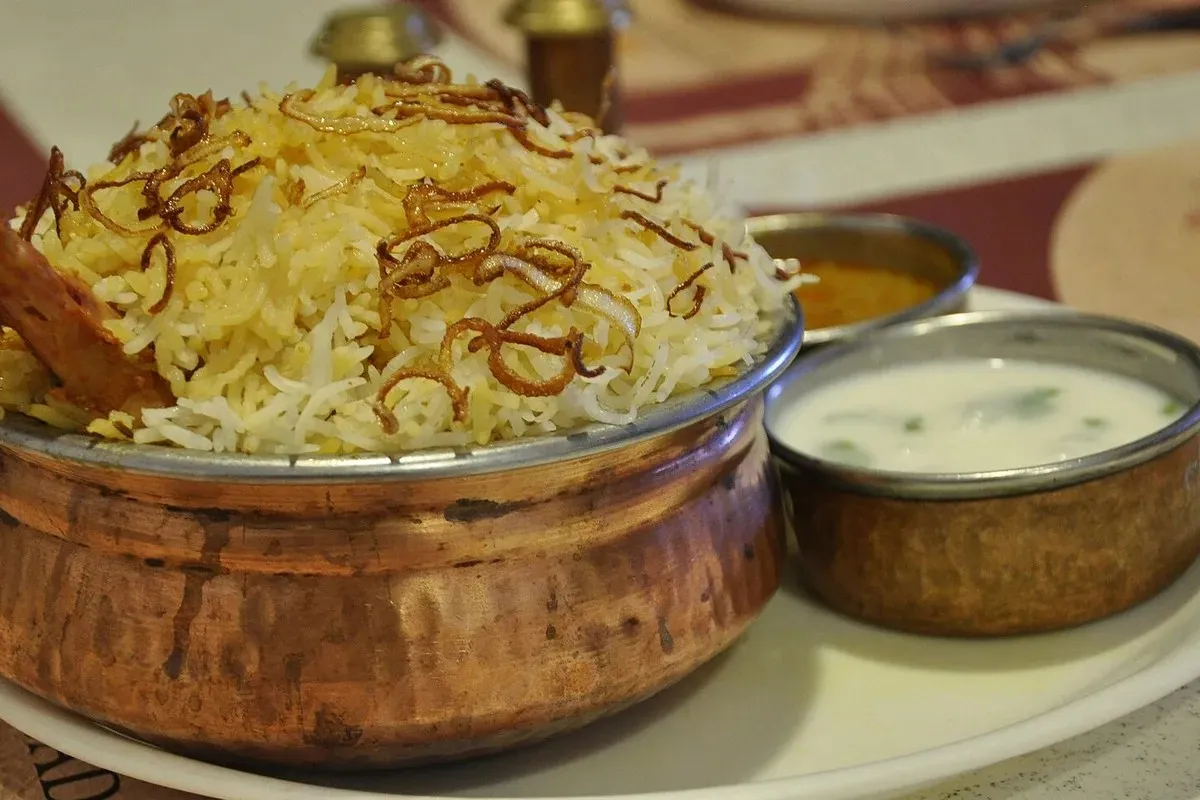
Shoot Biryani and Curries at 45 Degrees
Hold the phone at the height of a seated diner’s eyes and tilt it down at the bowl, at about 45 degrees.
This angle shows the top of the dish and a little of its depth. It suits biryani in a handi, curries, dal and rice plates, because it looks the way a diner sees the food at the table.
Shoot Burgers and Drinks From the Side
Bring the phone down to the level of the plate for anything tall or layered.
Burgers, stacked sandwiches, lassi glasses, falooda and layered desserts all show their layers from the side. From above, a burger looks like a plain bun.
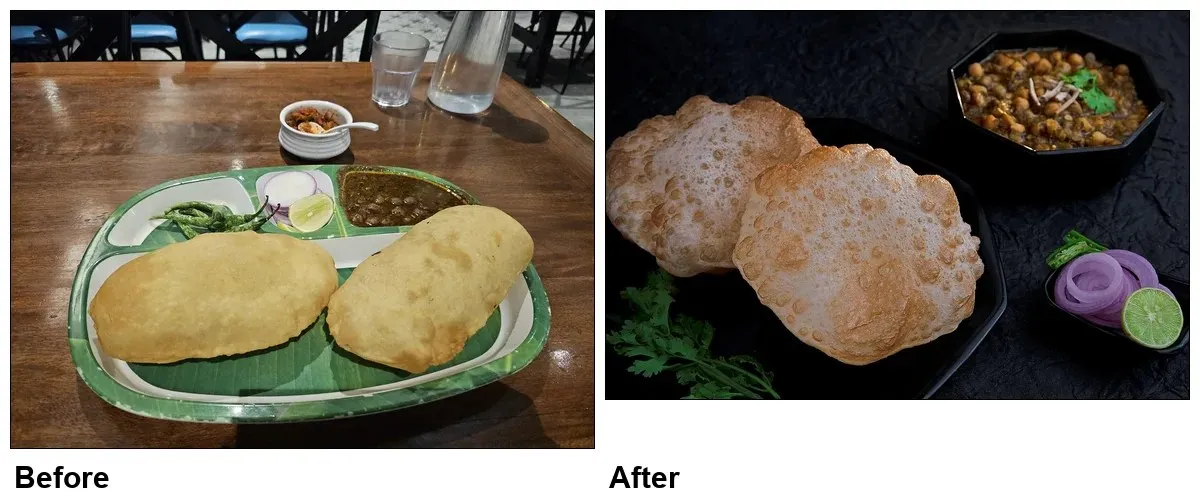
3. Walk Closer and Fill the Frame
Move the phone closer to the dish until the food fills most of the frame, and leave the digital zoom alone.
 Photos: Gannu03 (before) and Sutapa Pal (after), CC BY-SA 4.0, via Wikimedia Commons
Pinch-zoom only crops the picture, which can make it look soft. A true telephoto lens is fine to use, if your phone has one. Walking closer keeps the food sharp.
Leave a little space around the edge of the plate, so the dish does not feel squeezed. Clear the frame of anything that is not food, like menus, phones, bills and salt shakers.
Tap the screen on the most important part of the dish, such as the chicken in a biryani, to set the focus there.
4. Wipe the Plate Rim Before Every Shot
Wipe the rim of the plate with a clean cloth or a damp tissue before you take each photo.
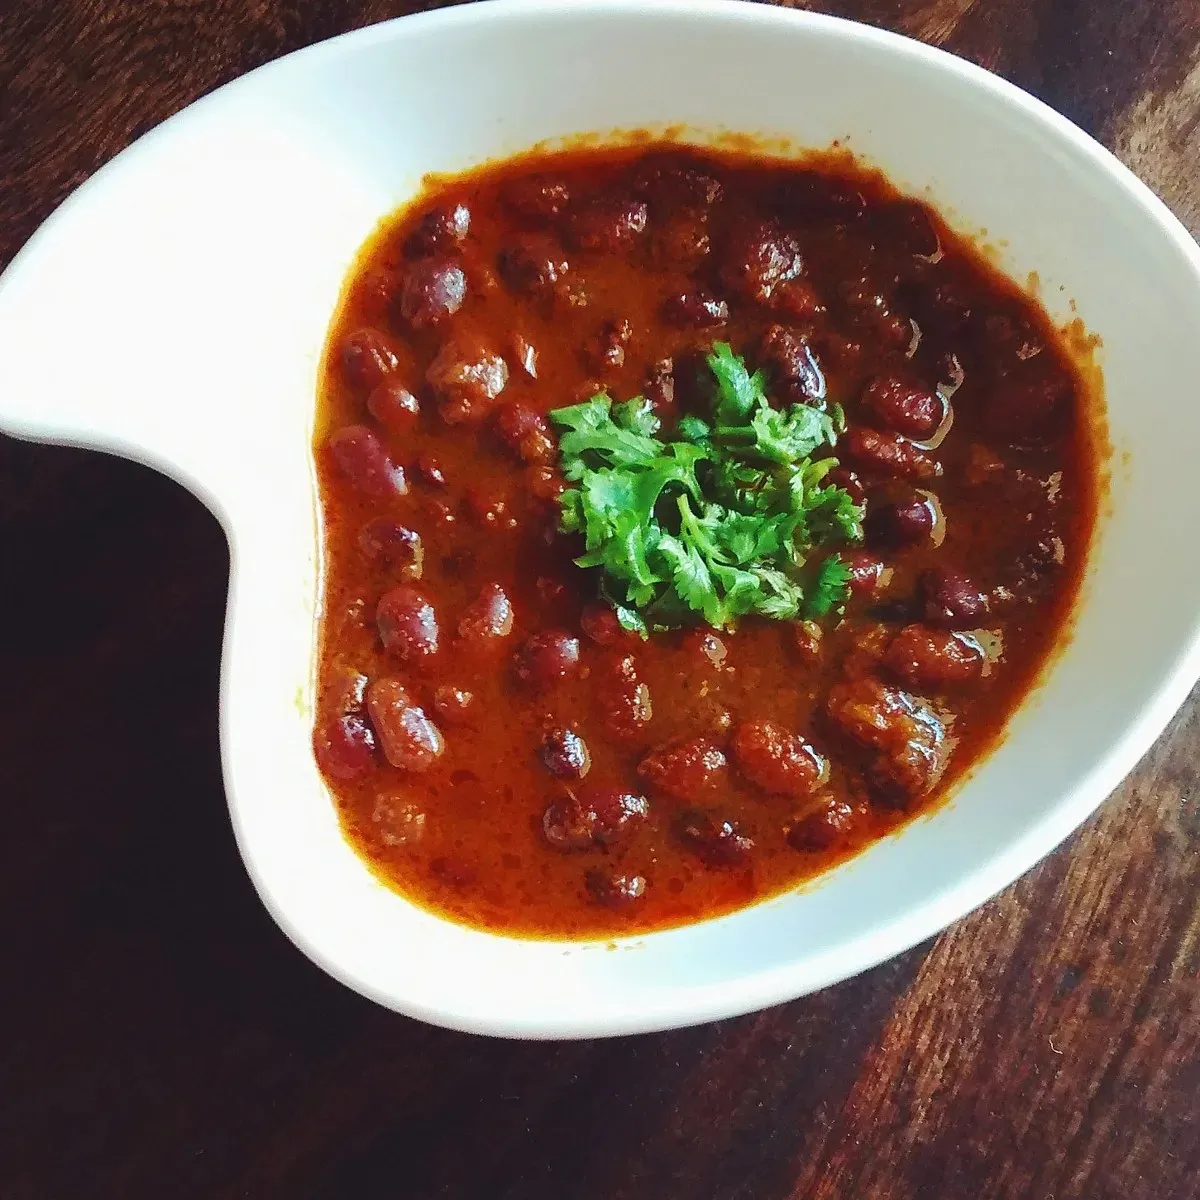 Photo: Monali.mishra, CC BY-SA 4.0, via Wikimedia Commons
Drips of gravy, smudges of oil and stray grains of rice look tiny at the table. In a close-up photo, they are often the first thing the eye lands on.
Keep a stack of kitchen towels and a few cotton buds on the shoot table. Before you move to the next dish, enlarge the photo you just took and check the rim once more.
5. Pick a Surface That Makes the Food Stand Out
Choose a table or background that contrasts with the colour of the food, so the dish stands out on a small screen.
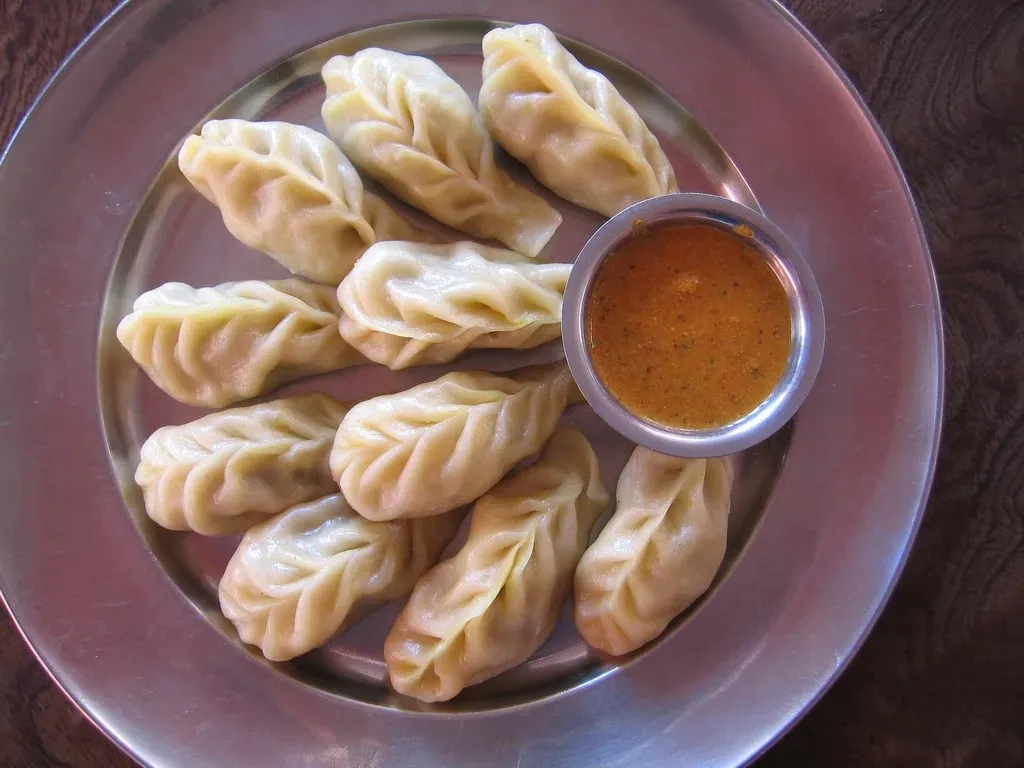 Photo: Ritesh Man Tamrakar, CC BY-SA 2.0, via Wikimedia Commons
A pale dish on a white plate on a white table disappears, and so does a dark curry in a black bowl on a dark table. Plain surfaces work best, because a busy tablecloth pulls the eye away from the food.
Use this table as a starting point:
| Food | Table or background to try |
|---|---|
| Pale food, like paneer, idli, momos and kheer | Dark wood, slate or a dark cloth |
| Dark food, like dal makhani, mutton curry and chocolate desserts | A light table or a pale cloth |
| Fried snacks and chaat | Plain brown paper or a light wooden board |
| Full meals and thalis | A plain dark table, so the brass or steel stands out |
Keep the plates you really serve in, and change only what is under them. A diner who sees a brass thali in the photo will expect one at the table.
6. Add the Cream Swirl and Coriander Last
Add fresh garnishes in the last minute before you shoot, because they wilt and sink quickly.
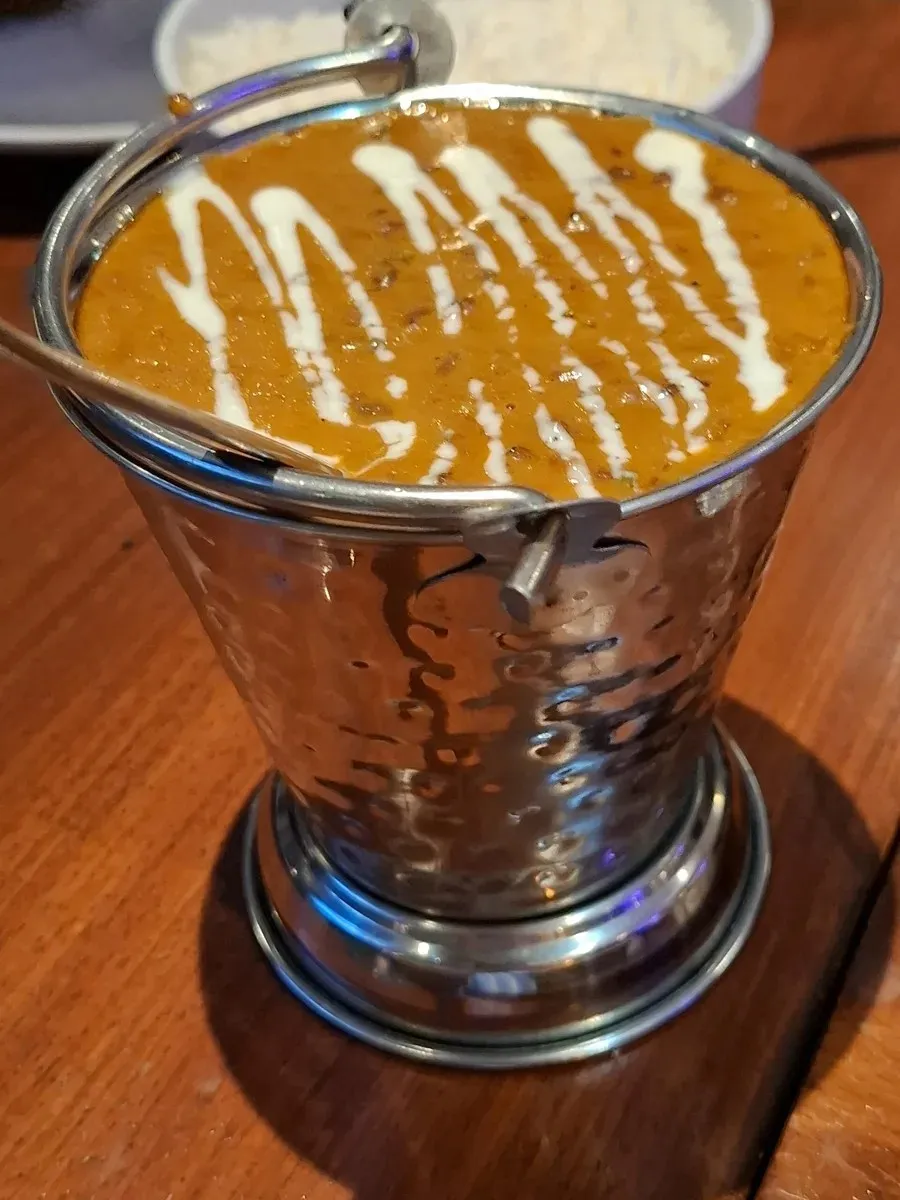 Photo: TarnishedPath, CC BY-SA 4.0, via Wikimedia Commons
A cream swirl spreads into the gravy, coriander turns dark and a sizzler stops sizzling within a few minutes of plating.
So plate the dish, set up your angle and check the light first. Then add the cream, coriander, a squeeze of lemon or a sprinkle of sev, and shoot straight away.
Keep the garnish to what you really serve. If your dal does not come with a cream swirl, leave the swirl out of the photo too.
Our food plating tips cover how to arrange the plate before you shoot.
7. Shoot the Real Portion You Serve
Photograph the same portion, plate and garnish a diner will get, so the dish that arrives matches the photo.
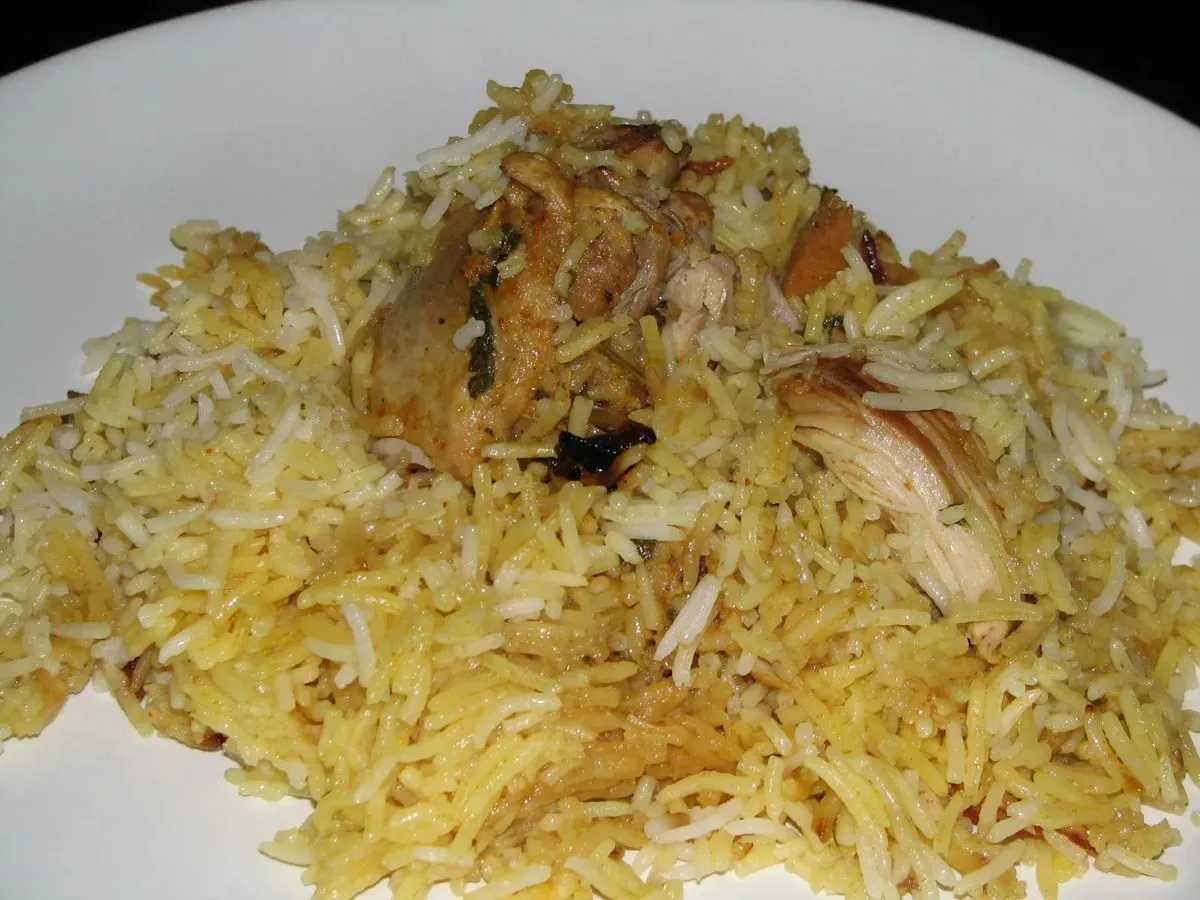 Photo: Umesh Tongbra, CC BY-SA 3.0, via Wikimedia Commons
A photo that shows a bigger portion or extra toppings may win the order. It also sets up a disappointed diner when the real plate arrives.
Ask your kitchen to plate the photo dish exactly the way they would for a guest. If you have a standard portion weight, weigh it, then shoot it as it is.
8. Keep Delivery App Photos to One Dish
On a delivery app, show one menu item per photo on a plain background, so the diner knows exactly what they are buying.
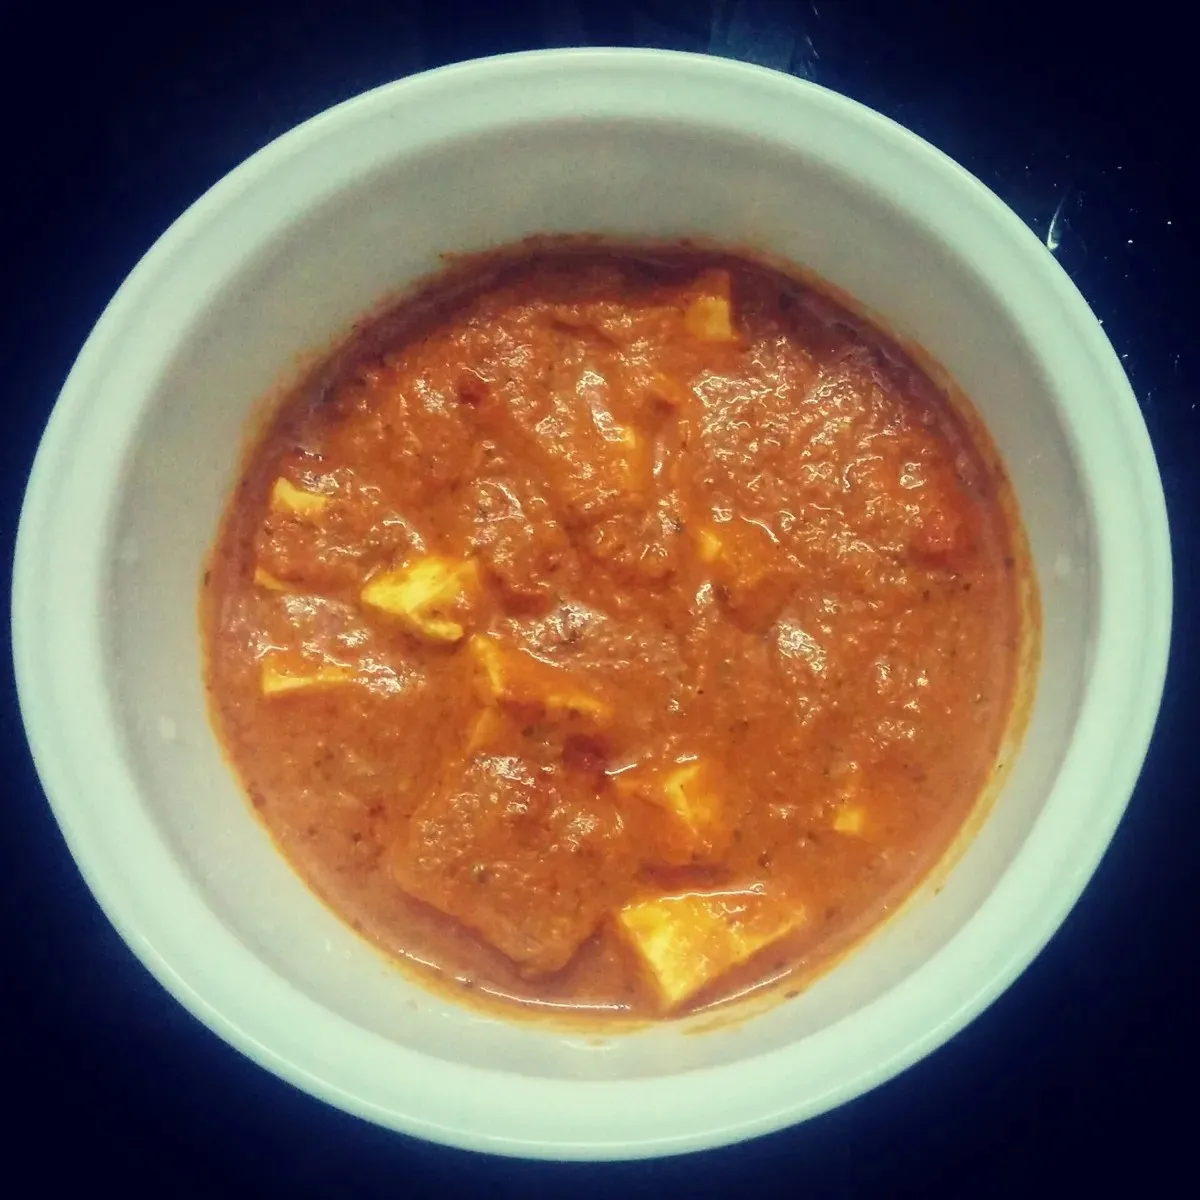 Photo: TabassumJawed, CC BY-SA 4.0, via Wikimedia Commons
Google’s rules for ordering platforms that list menus on Google ask for one item per photo. Its ordering policy says menu item photos “should be well-lit, feature one in-focus menu item, must not include people or other non-food images”.
It is a good rule for any delivery listing. Keep hands out of the shot, and leave out sides and drinks unless they come with the item.
Treat a combo as one item, so if it includes a drink, show the drink. If it does not, leave the drink out, so nobody expects one in the bag.
Our guide to a bestselling delivery menu covers the rest of the listing.
9. Edit Brightness and Warmth Lightly
Use your phone’s own photo editor to lift the brightness a little and, if the photo looks cold, add a touch of warmth. Then stop.
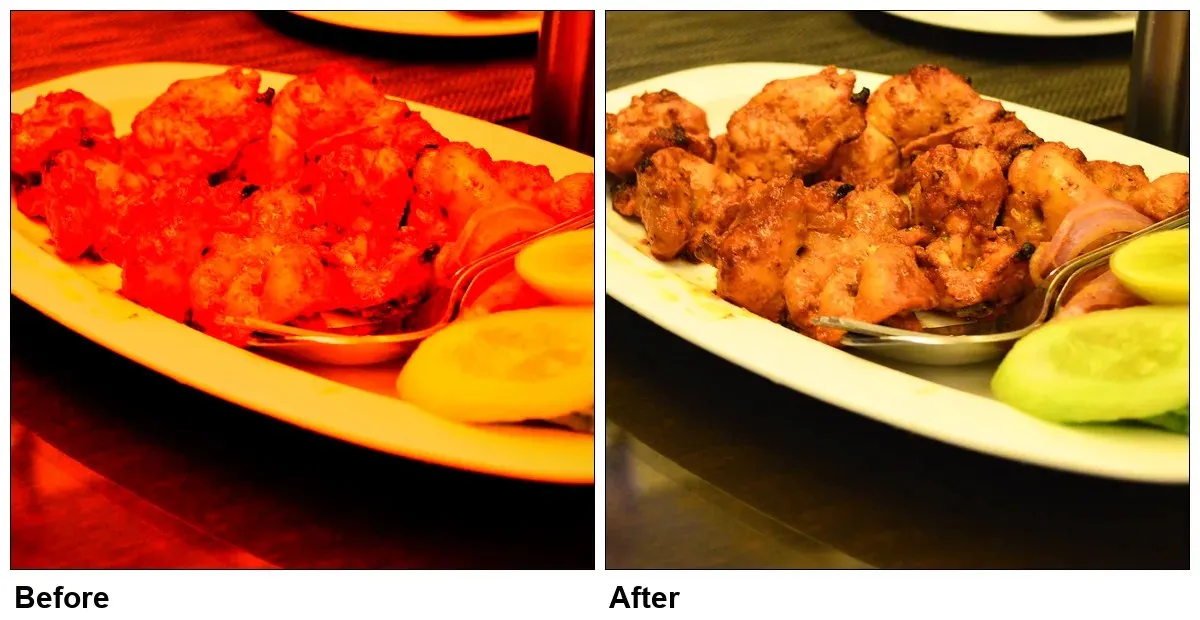 Photo: Minaxibose1992, CC BY-SA 4.0, via Wikimedia Commons; both versions edited by Petpooja, shared under CC BY-SA 4.0
Small changes make food look fresh and lit by daylight. Heavy filters shift colours, so a red curry can turn orange or pink on screen.
Keep to these rules:
- Brightness: raise it until any white, like the plate or the rice, looks white.
- Warmth: add a little if the photo looks blue or cold.
- Straighten: fix a tilted plate or table edge.
- Skip: heavy filters, beauty modes and colour boosts.
Hold the edited photo next to the real dish. If the two look different, undo part of the edit.
Google’s photo guidelines for business listings point the same way. They ask for photos that are in focus and well lit, without heavy filters, so the image “should represent reality”.
10. Shoot Vertical for Reels and Stories
Hold the phone upright for video and for any photo meant for Reels or Stories. Those formats fill the phone screen from top to bottom.
A sideways video looks small inside a tall frame. Keep the dish large, in the middle of an upright shot. Then you can crop a square from it for a feed post and still keep all the food.
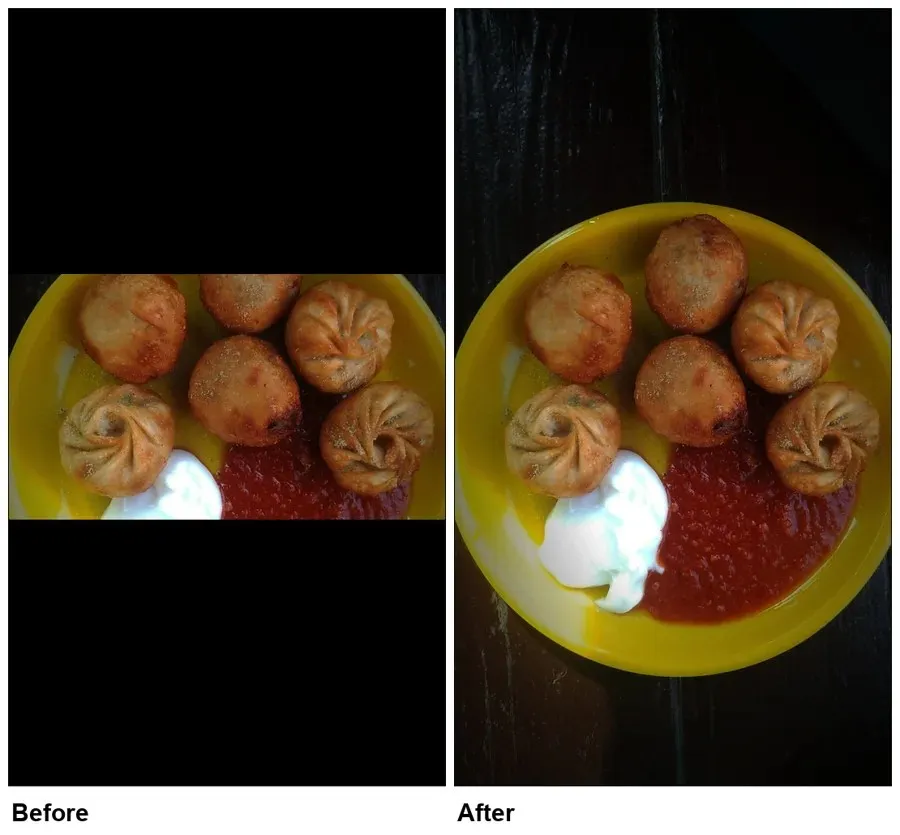 Photo: Image35, CC BY-SA 4.0, via Wikimedia Commons; the before version cropped by Petpooja
Dish
Whole frame for a Reel
Square crop for a post
Dish kept in the centre
Shoot upright once,
then crop the square later.
One upright shot with the dish in the centre gives you a full frame for a Reel and a square crop for a feed post.
Frame every Reel shot this way, and one shot covers both formats.
Short clips suit plating moments, like a cream swirl, a cheese pull or a sizzler arriving at the table. Prop the phone against a glass, so the shot stays still.
Our video marketing tips cover what to post. These food photo design tips help you prepare photos for social media.
How Do You Plan a 90-Minute Menu Photo Shoot?
Plan the shoot in five steps, and you can photograph your top 10 sellers in about 90 minutes before service.
- Pick your top 10 sellers. Pull them from your sales report, so you shoot the dishes that already sell the most.
- Prep the garnishes. Chop the coriander, fill a cream bottle and keep lemons and spare gravy ready. Have it all ready before you plate the first dish, so plated food never waits.
- Set up one window table and two surfaces. Use a light surface for dark dishes and a dark one for pale dishes, as in tip 5.
- Shoot the angle that suits each dish, plus one spare angle and a short vertical clip. Use tip 2 to pick the angle, then keep the best shot. Film a few seconds of video with the phone upright.
- Name and store the files. Name each file after the dish and save it in one shared folder. Then anyone updating a menu or a post can find it.
With prep and setup inside the 90 minutes, each dish gets well under nine minutes. So keep the kitchen plating one dish ahead of the camera.
Run the shoot on a quiet morning, when the kitchen has time to plate each dish with care.
How Does Petpooja Help Your Food Photos Sell?
Petpooja is restaurant management software, with a point of sale (POS) system that runs billing, menus, inventory and reports for restaurants across India. It puts your food photos in front of guests on menus, kiosks and TV menu boards.
Menu management: you upload item images in Petpooja’s menu management software. A bulk upload handles many items at once.
Self-order kiosk: Petpooja’s self-order kiosk shows guests a photo-forward menu, so your dish photos do the selling at the counter. Its home screen can also show promotional images in portrait.
TV menu boards: the digital display system turns an Android TV into a menu board. It shows full-quality images and short video loops, so your plating clips have a place to play.
The kiosk and the TV menu boards run alongside Petpooja’s Offline and Electron POS, and not the Lite or Android versions.
Marketing: Marketing Manager runs WhatsApp campaigns from ready-made templates for festivals and events, and ads on Meta and Snapchat to reach new diners. Your new dish photos give those campaigns and ads something worth showing.
Want a quick look at what sells? Ask Petpooja’s artificial intelligence (AI) assistant, Ask Me Anything, a plain question such as “What were my top-selling items yesterday?” Ask it on a few days to see which dishes sell week after week.
What I could recommend from my end: upload the new photos for your top 10 sellers first, using the bulk image upload in menu management. Then check how each one looks on your kiosk or TV menu before you add the rest of the menu.
To see it with your own menu, book a free demo.
Conclusion
These food photography tips for restaurants need little more than a phone, a window and some planning.
Get the light and the angle right first. Keep the plate clean and shoot the portion you really serve. Then keep delivery photos to one dish and shoot upright for video.
Start with your top 10 sellers this week. A restaurant POS that shows item photos on kiosks and TV menu boards gives those photos more places to sell.
Frequently Asked Questions
Can I use the same photo on delivery apps and Instagram?
Use the same shoot, but pick a different shot for each. Delivery apps work best with the plain, one-dish frame from tip 8. Instagram leaves room for a styled table, hands or a vertical clip. Our Instagram marketing tips cover what to post and how to grow your page.
How many menu items need photos?
Aim for a photo on every item you list for delivery, since a blank item gives a diner less to judge it by. Get there in stages, starting with your best sellers and new dishes, then working down the menu.
How often should a restaurant reshoot its menu?
Reshoot a dish whenever its recipe, portion, plating or plate changes, and shoot every new dish before it goes on the menu.
What should I brief a hired food photographer?
Give them a shot list with each dish and the angles you want. Note where each photo will go, such as a delivery app, a menu board or a Reel. Share two or three photos whose style you like, and ask for the files to be named by dish.
Thanks. This helps us make the next article better.

Fatema Rasiwala is a growth marketer & content writer at Petpooja. She likes to define herself as a wordsmith of the digital page, keeping up with restaurant industry trends, and crafting tales of mirth with a sharp wit. Reach her at fatema.rasiwala@petpooja.com